

Building Custom Context Agents
The NotebookLM Toolkit

The Digital Curbside. Practical technology guides for physicians, by a physician.
Part 4.
A few years ago, I assumed that building a custom chatbot, one that answers questions from a specific book and nothing else, was a job for someone who writes code. In fact, the first time I ever explored this a few years ago, that was exactly what I did. I literally hired an AI-coder, uploaded dozens of textbooks, and trained a custom small-language model to answer questions about plastic surgery.
But turns out that today, you can build a working version of that in about ten minutes without touching a line of code, and the entire reason I am writing this issue is that the result is genuinely useful for studying, and genuinely dangerous if you trust it blindly. Both of those are true at once, which is exactly the kind of tool worth understanding properly.
Here is what we are going to build. A small chat interface, living inside Claude, that answers questions using only a textbook you upload, cites the page it pulled the answer from, and tells you plainly when the book does not cover something instead of making an answer up. Think of it as turning a static 1000+ page PDF (the average medical textbook) into something you can actually interrogate and interact with. So the question for this issue is simple. Can we make the book answer us, in its own words, without it quietly inventing answers when it does not know. The first half is the easy part. The later is the entire point of today’s issue.
What We Are Building
We are building what Claude calls an AI-powered artifact. In Part 3 I used a live artifact for the Morning Brief, a page that gathers and refreshes. This is the same idea with one addition - in this case, the artifact can call Claude itself, every time you ask it something. So instead of a static page, you get a little app with a brain, and we are going to point that brain at one book (or more) and totally fence it in.
Two things make this work now that did not a year ago. Artifacts can run their own Claude inference, so the chat box can actually answer. And artifacts can take an uploaded file directly, so the textbook can live inside the app rather than in the conversation. There is an additional added feature (which rivals ChatGPT) - you can publish the finished artifact and hand the link to your friends and coworkers, and it runs on each of their own Claude interface.
The honest counterweight before we build, is if all you want is to ask one book questions for yourself, a Claude Project, where you upload the book as background knowledge and just chat with it, is simpler and you can skip the build entirely. There is also a middle option, NotebookLM, which is the easiest path to a shareable, well-grounded version and needs almost no setup. I walk through it at the end of this issue. The artifact is worth building when you want a focused, self-contained tool with strict rules baked in that you control completely.
Building The Textbook Chatbot
Setting: You want a chat box that answers from a textbook context. Start with a single chapter or one board-review book that you legally own.
Step 1: Upload the file and have Claude read it first.
Open Claude, start a new conversation, and drag the textbook PDF into the message box. Before building anything, ask it to confirm what it can see: “Read this textbook PDF and tell me the chapter structure and whether the page numbers are readable, so we know what we are working with.” This is the same “make it read before it builds” habit from the Part 1 handout walkthrough, and it catches a bad scan or a missing text layer before you waste time.
Step 2: Ask Claude to build the artifact, with rules.
Now describe the app and, more importantly, its guardrails and permissions: “Build me an AI-powered artifact, a clean chat interface that answers questions using only the content of the textbook I uploaded. Hard rules for the artifact: every answer must come from the textbook text, every answer must cite the chapter and page it came from, and if the answer is not in the text, it must reply exactly ‘Not covered in this source’ and must not answer from general knowledge, unless specifically prompted again. Show the running conversation on screen. Put a one-line disclaimer at the top that this is a study aid, not clinical guidance.” Claude generates the artifact and it appears in the panel on the right, ready to test.
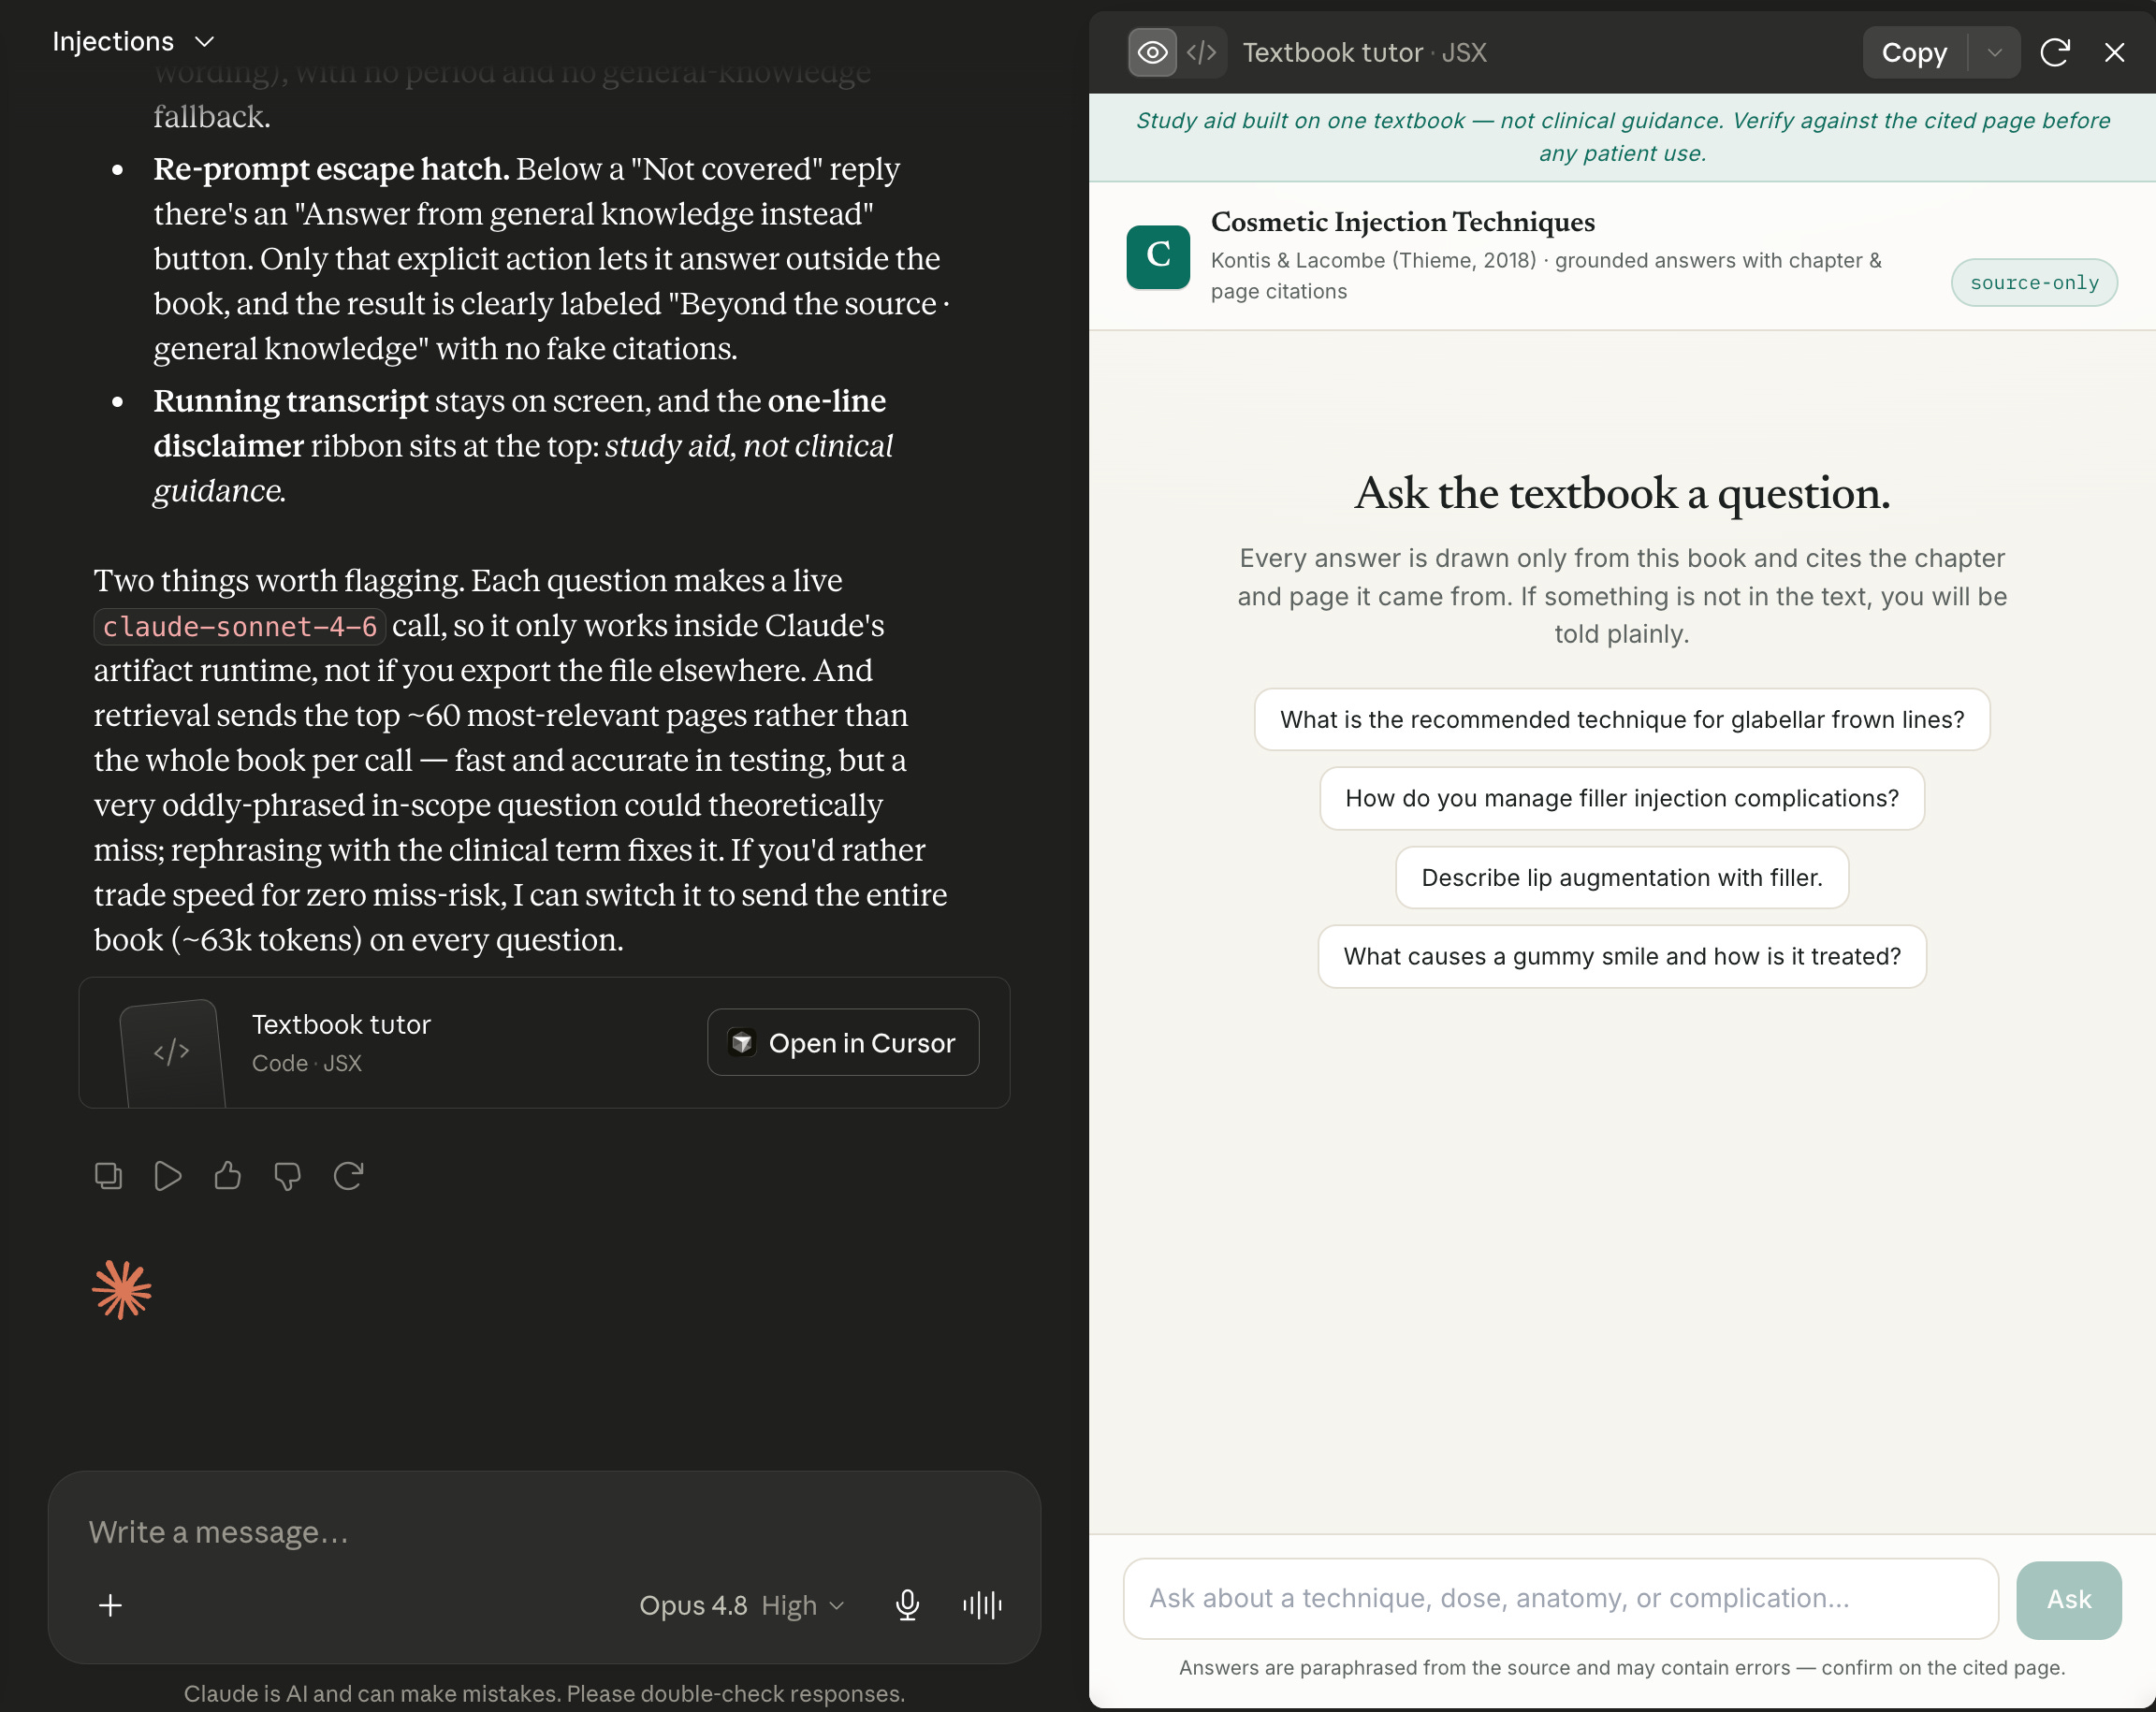
If it doesn’t appear for you automatically for any reason, click on this banner, and it will open up in the right panel.

Step 3: Decide how the book gets in, embedded or uploaded.
Tell Claude which of two builds you want. The embedded version puts the extracted text inside the artifact, which is simplest and fine for a single chapter you are keeping to yourself. The upload version makes the artifact accept the PDF at runtime, so the user drops their own copy in when they open it. Use the upload version if the book is large or if you plan to share it, for both the size of the average textbook and for copyright reasons (you don’t want to be sharing artifacts with copyrighted material you don’t own).
Step 4: Run the refusal test before you trust a single answer.
This is the most important step in the guide, so do not skip it. Ask the artifact three questions in a row. One you know is in the book, and check that the cited page is actually right. One you know is not in the book, and confirm it answers “Not covered in this source” instead of inventing something. And one that is borderline, to see how it behaves with these edge cases.
Step 5: Tighten the citations.
Refine it the way you would refine a draft, and simply by chatting with Claude: “For every answer, show the exact page and a short direct quote from the source that supports it. If you are paraphrasing rather than quoting, say so.” A visible quote you can eyeball against the real page is what makes the tool auditable instead of just confident.
I want to stop here to discuss why I find these artifacts much more powerful that the CustomGPT functionality offered by ChatGPT. For the average user, putting together a CustomGPT with robust instructions, in one go, can be fairly difficult, if not impossible. Claude allows you to edit live artifacts, simply by chatting. It updates the instructions that run your artifact in real-time, without you having to constantly edit the prompt. To me, this provides significantly more flexibility, and is much more intuitive.
Step 6: Publish and share as you wish.
When it behaves, click ‘Publish’ in the top-right of the artifact and copy the link. Anyone you send it to runs it on their own Claude subscription, so it costs you nothing to share with a whole program of residents. Share the upload version, not the embedded one, so each resident supplies their own legally obtained copy of the book rather than receiving yours, but still maintains your instructions and refinements. Then reuse the same build for your next textbook by swapping the file.
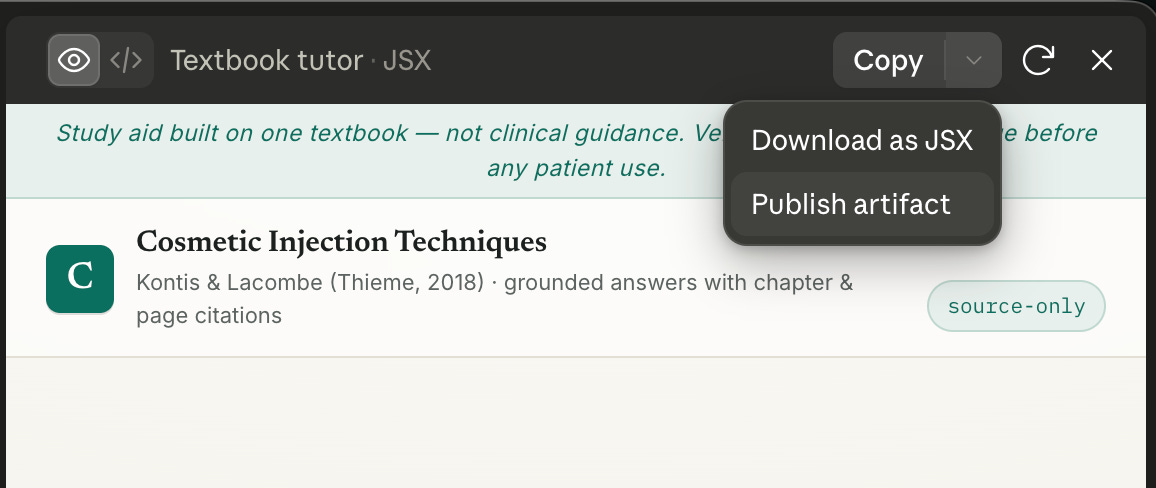
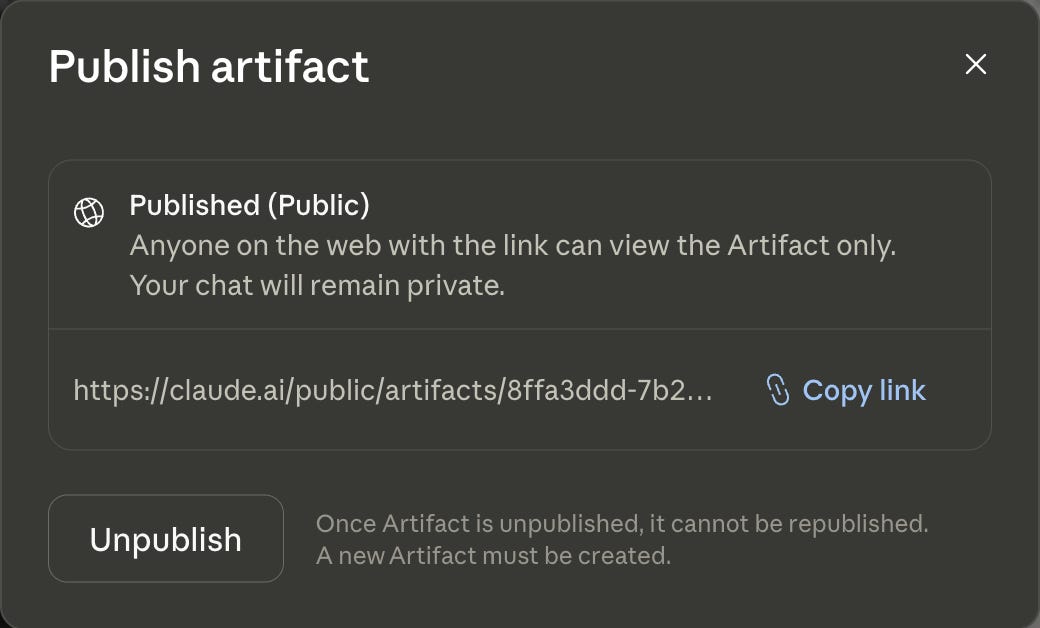
Once you publish the artifact, you can view it and use it at any times from the “Artifacts” tab on the left side, or from the chat you created it in.
The NotebookLM Alternative
If reading all of that made you want something simpler, there is a tool built for exactly this job, and it handles the grounding problem better than a hand-built artifact does. It is NotebookLM, the Google research tool we discussed in Part 2. The trade is that you give up some of the control and the custom feel of building your own, and in return you get stronger grounding and far easier sharing with almost no setup. For most physicians who just want to ask a textbook questions, this is the route I would actually start with.
Step 1: Create a notebook and upload the book.
Go to notebooklm.google.com, sign in with your Google account, and create a new notebook. Click to add a source and upload the textbook PDF. Each source can be up to 500,000 words or 200 megabytes, and a single comprehensive textbook is often much larger than this. If it is, split it by volume, or just upload the few chapters you are actually studying. The free tier holds up to 50 sources in one notebook, which is plenty for this task.
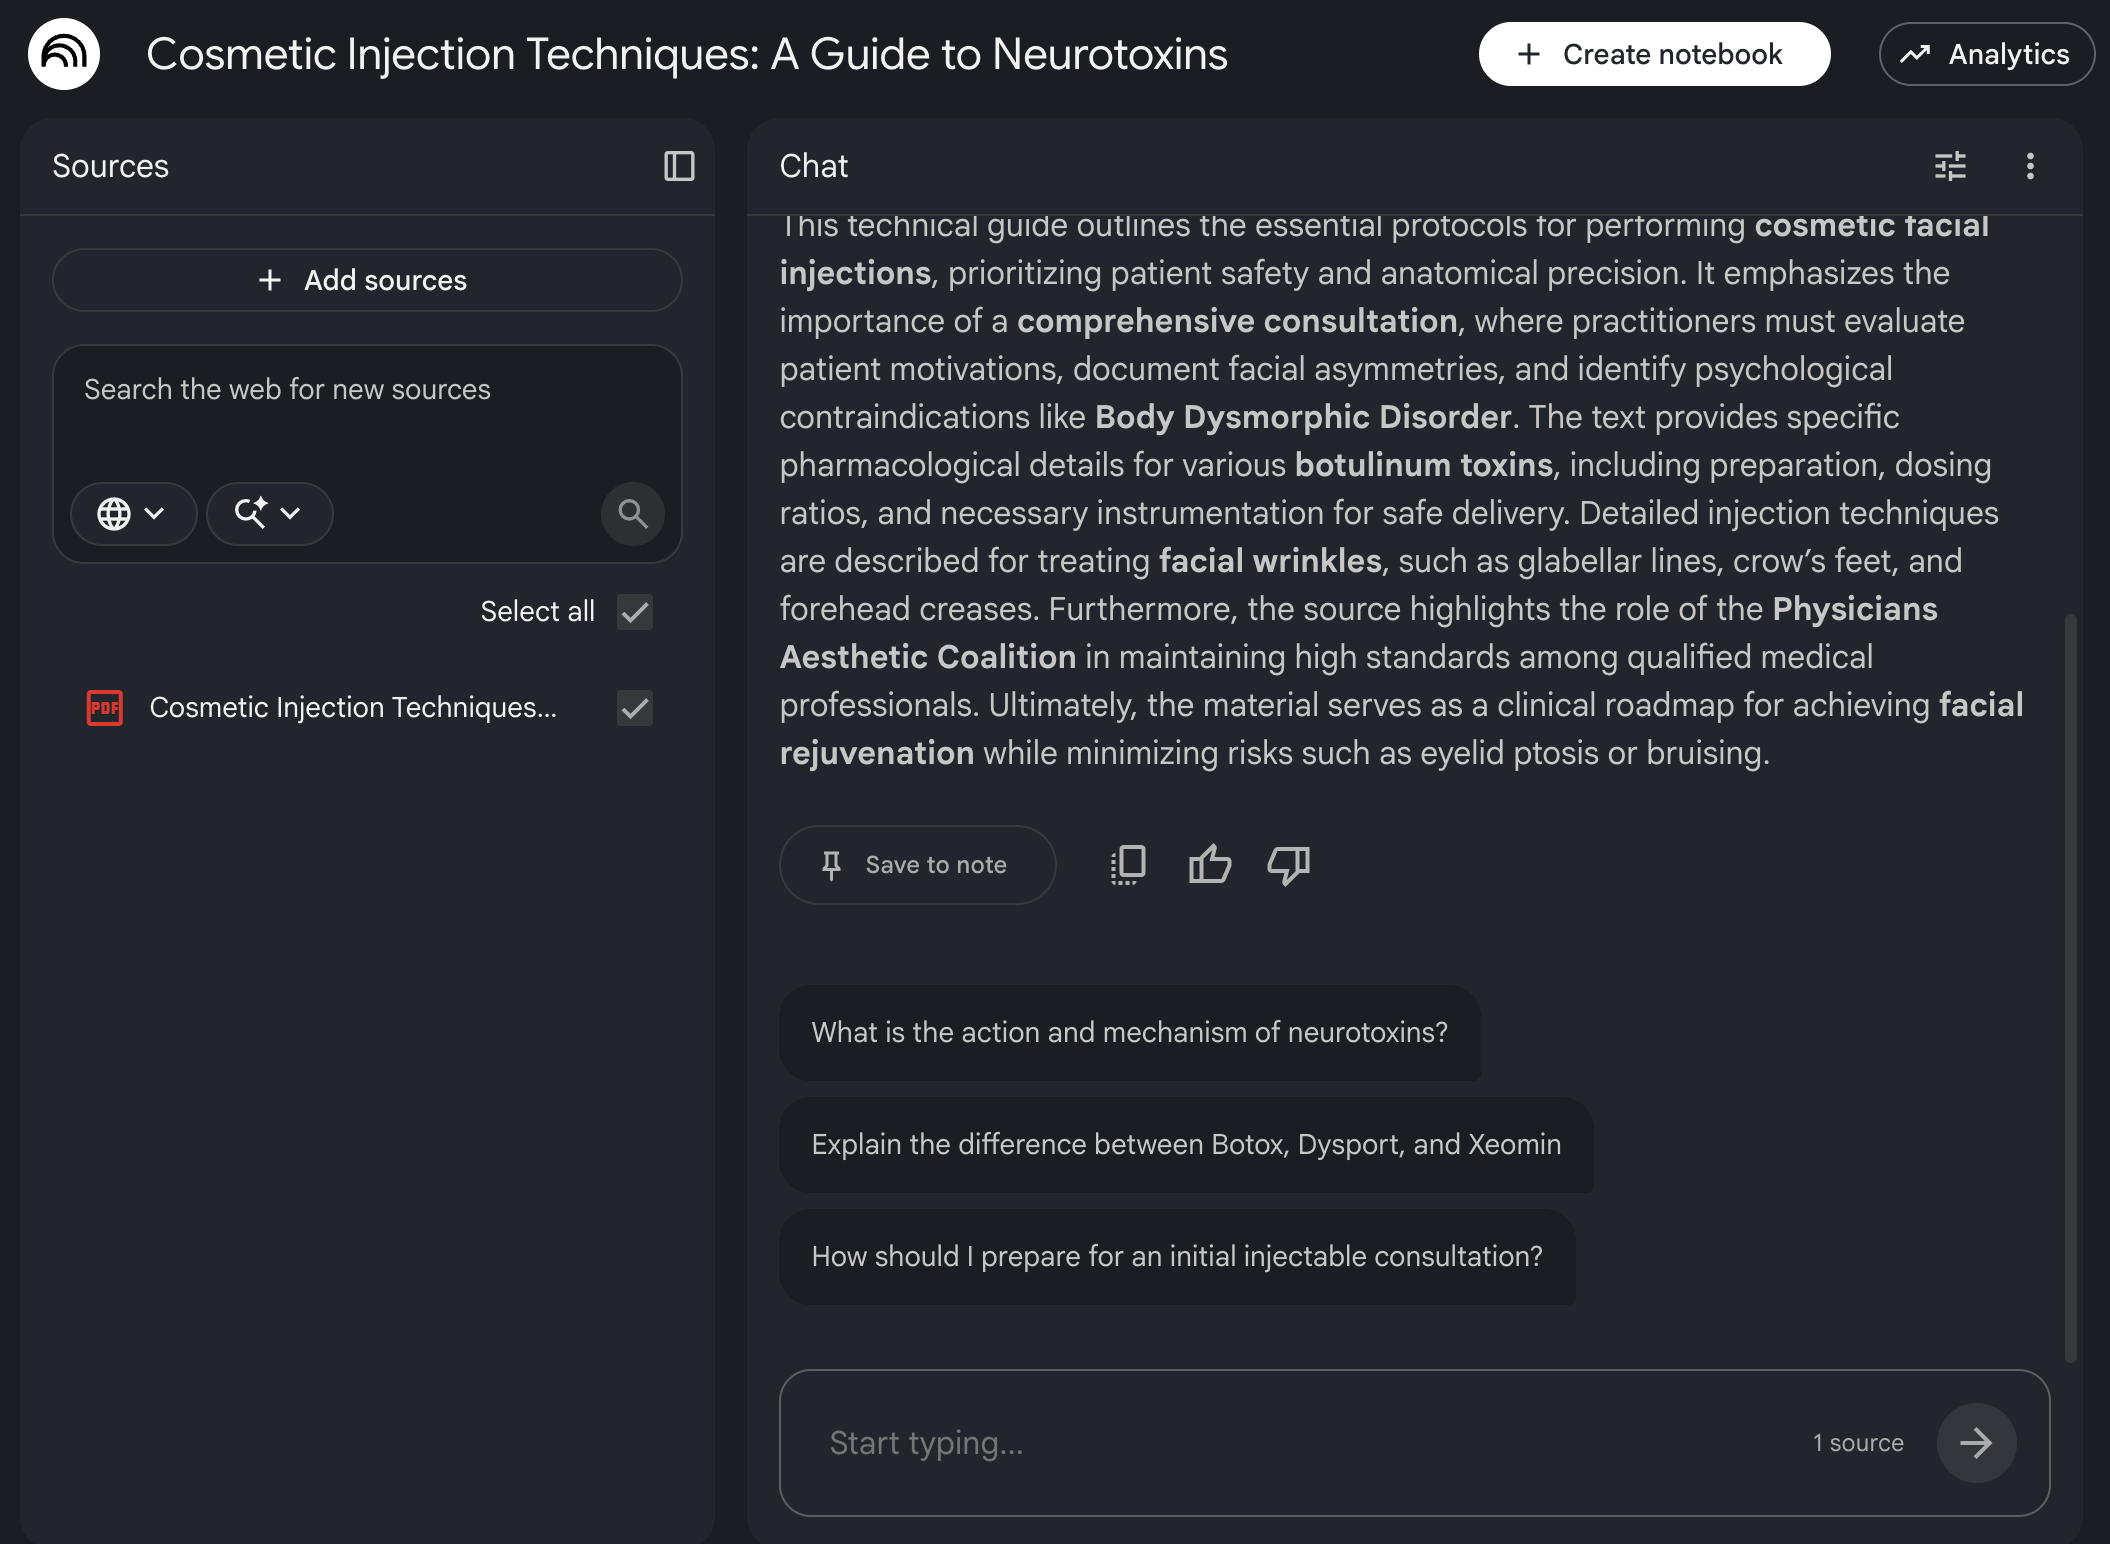
Step 2: Ask your questions, and watch the citations.
Type a question the same way you would ask anyone: “What are the contraindications to immediate implant-based reconstruction, and what does this source say about timing relative to radiation?” The answer comes back with small numbered citations inline, and clicking one jumps you straight to the exact passage in the PDF it pulled from. This is the part that makes it stronger than the DIY artifact (or CustomGPTs) for providing you with accurate responses. It is built to answer only from the sources you gave it, and it will tell you when something is not in them instead of reaching into general knowledge.
Step 3: Turn it into study material, if you want.
Because it is NotebookLM, you are not limited to chat. From the side panel you can generate a Study Guide, an FAQ, or an Audio Overview of the chapter, the same features from Part 2, now pointed at your textbooks.
Step 4: Share it with your co-residents or colleagues.
Click the ‘Share’ button in the top-right. You can share the notebook with specific people by email, or copy a link. Whoever you share it with can ask the notebook their own questions and listen to the Audio Overviews, but they cannot add their own sources or alter yours.

One important line on copyright, because sharing here means sharing the book itself. When the source is a copyrighted textbook, share the notebook privately, with named colleagues by email, not as a public link.
The Bottom Line
This is one of the more genuinely impressive things you can build in Claude or Gemini with zero code, and it is also a clean example of the whole argument behind this newsletter. The artifact turns a dead PDF into something you can question, in seconds, with sources. And it will, without hesitation, hand you a fabricated answer with a very realistic looking citation if you do not build and test the guardrail that stops this.
If you want the control and a shareable mini-app that is yours, build the artifact and run the refusal test before you trust it. If you want the fastest, best-grounded version to hand to others, use NotebookLM.
© The Digital Curbside. All clinical examples are educational and de-identified. Nothing in this guide constitutes medical advice or clinical decision support.